Specialist Drywall Repair Irving Texas: Your Wall Repair Remedy
Wiki Article
Beyond Paint: Expert Drywall Fixing Solutions to Recover Your Walls to Excellence

Are your wall surfaces in need of some significant TLC? Look no even more, because in this post, we have actually got skilled drywall repair options that will certainly recover your walls to excellence.
Understanding the Typical Drywall Issues
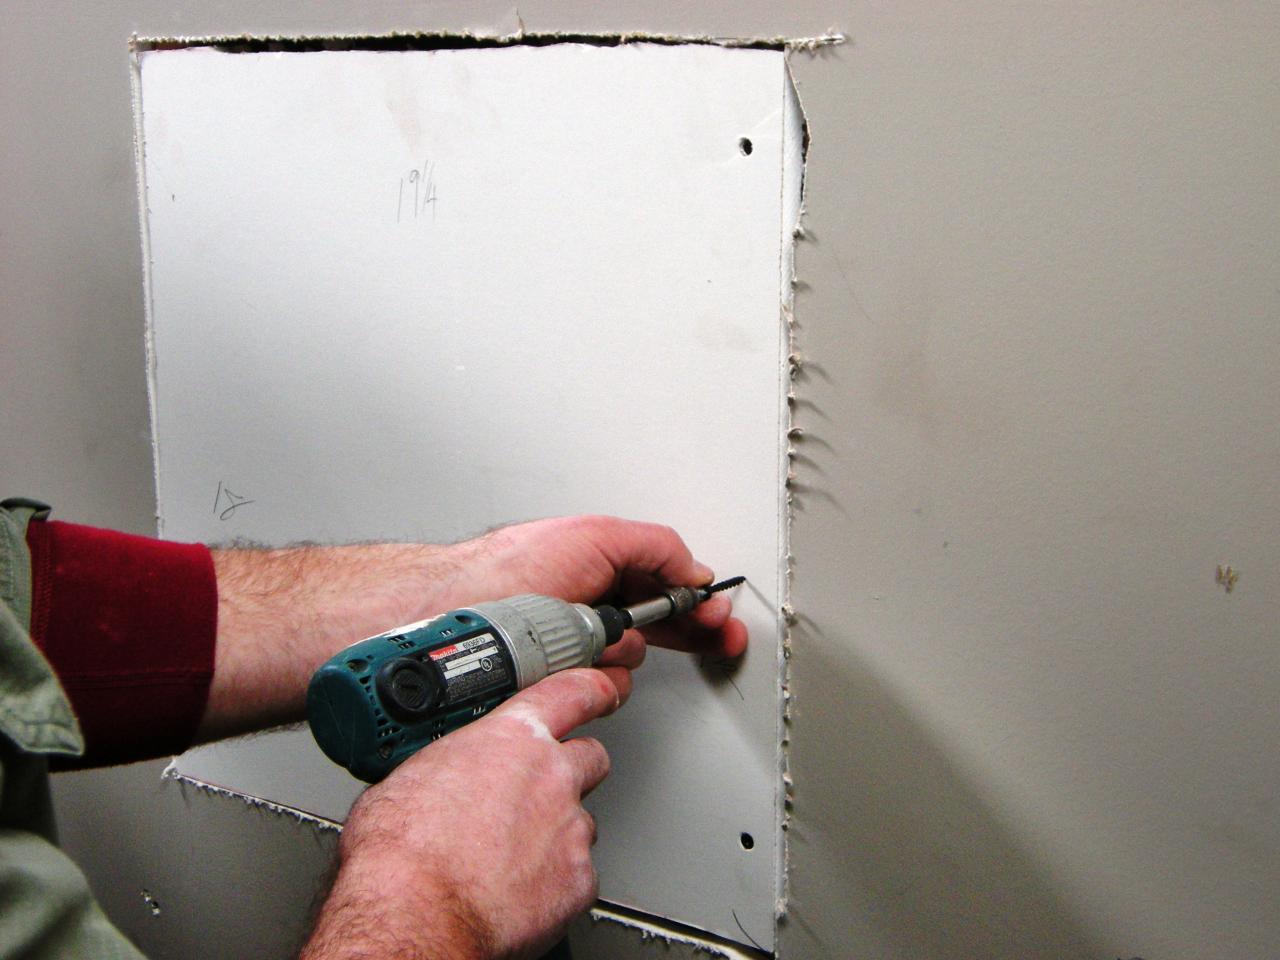
Recognizing the most common drywall concerns can aid property owners make informed decisions about repairs. When it comes to your walls, it's vital to be conscious of the issues that can arise. You may need to patch and fix the fractures or reset the nails to remove the nail stands out.Necessary Tools and Products for Drywall Repair Service
To get begun with drywall repair work, you'll need a few essential tools and materials. In addition, a drywall saw will certainly be essential for bigger repairs that call for reducing out damaged areas.In terms of materials, you'll require drywall joint compound to fill up in any type of holes or cracks. Make certain to have some guide and paint that matches the shade of your wall surfaces to finish off the repair work.
With these necessary tools and products, you'll be well-appointed to deal with any type of drywall repair work task. Remember to take your time and comply with proper methods to make sure a professional-looking and smooth surface.
Step-by-Step Guide to Patching Small Holes and Cracks
As soon as you've collected the necessary tools and products, you can start patching small openings and splits in your drywall (drywall repair Irving Texas). Start by cleansing the area around the opening or fracture with a damp towel to remove any type of dirt or particles. Next off, use a putty knife to use a slim layer of spackling compound over the broken area. Ensure to spread it evenly and feather the edges to mix it with the bordering wall. Permit the substance to completely dry entirely, which normally takes regarding 24-hour. Once dry, gently sand the patched location with fine-grit sandpaper to ravel any ridges or bumps. Wipe away the dust with a clean fabric. Currently, you're prepared to apply a 2nd layer of spackling substance to ensure a seamless repair. Repeat the drying out and fining sand procedure. Prime and repaint the patched location to match the rest of your wall surface. With a little persistence and technique, you'll have the ability to achieve professional-looking results and recover your drywall to excellence.Taking On Large Drywall Damage: Techniques and Tips
When tackling huge drywall damages, it is very important to assess the extent of the problem prior to beginning any type of repair services. Start by examining the broken area carefully. Seek any kind of cracks, holes, or architectural concerns. Determine if the damages is surface or if it prolongs much deeper into the wall surface. This preliminary evaluation will assist you intend the required repair work and collect the best products.When you have evaluated the damages, you can begin preparing the location for fixing. Get rid of any kind of loose or damaged drywall pieces, taking care not to trigger additional damage. Make use of an energy knife to remove any sections that are past repair work. Ravel the edges of the staying drywall to create a tidy surface for patching.
Next, you will certainly need to use joint compound to fill in the broken location. Utilize a putty knife to spread out the compound evenly, feathering the edges to blend it with the bordering wall.
After sanding, use a second layer of joint substance if required. see this here Continue sanding until the repaired location is flush with the remainder of the wall surface. You can proceed to prime and repaint the fixed area to match the remainder of the wall surface. when you are satisfied with the results.
Completing Touches: Sanding, Priming, and Painting Your Repaired Wall Surfaces
This step is vital for accomplishing a smooth and seamless finish on your fixed walls. It will certainly likewise help to mix the repaired locations with the rest of the wall surface, making sure a constant this article texture throughout.To use the second layer of joint compound, beginning by preparing the compound according to the supplier's directions (interior painting Irving Texas). Make use of a clean trowel to dig a percentage of compound and spread it evenly over the repaired locations. See to it to feather the sides of the compound to produce a smooth change between the fixed area and the surrounding wall surface
As soon as the second layer of substance is applied, enable it to completely dry completely before relocating on to the next step. This generally takes regarding 24-hour, but it is necessary to check the maker's guidelines for particular drying out times. After the substance is completely dry, lightly sand the surface to get rid of any kind of rough areas or ridges. Clean away any kind of dust with a moist cloth.
With the second layer of joint compound fined sand and applied, your repaired wall surfaces are currently ready for priming and painting. Apply a coat of primer to seal the repaired areas and provide a great base for the paint. When the guide is completely dry, you can then proceed to paint your walls with your selected color, utilizing a roller or brush.
Verdict
Remember to finish off your repair by fining sand, priming, and painting your wall surfaces for a remarkable coating. With these specialist drywall repair service options, your wall surfaces will be restored to excellence try these out in no time.Look no additionally, since in this short article, we have actually obtained expert drywall repair work options that will certainly restore your wall surfaces to excellence. Continue fining sand until the fixed area is flush with the remainder of the wall. Make certain to feather the edges of the substance to create a smooth change between the fixed area and the surrounding wall surface.

Report this wiki page